Beranda
/ To Remove A Drain Assembly : 7 Bathtub Plumbing Installation Drain Diagrams / If the motor doesn't operate at all or just hums, you probably need to replace the pump and motor assembly.
To Remove A Drain Assembly : 7 Bathtub Plumbing Installation Drain Diagrams / If the motor doesn't operate at all or just hums, you probably need to replace the pump and motor assembly.
To Remove A Drain Assembly : 7 Bathtub Plumbing Installation Drain Diagrams / If the motor doesn't operate at all or just hums, you probably need to replace the pump and motor assembly.. Tubs with screens usually have a bucket, or plunger, type stopper assembly that stops the water inside the drain pipe. If you are replacing the entire assembly, or the clog won't budge, then you'll need to remove the bottom assembly rod. The tool is called a tub drain. The entire drain assembly should be removed so the seals can be inspected. Have you had issues with your ge dishwasher not draining?
Since you cannot access the underside of the bathtub, you must remove the stopper to access the drain body. Trip lever plunger drain assembly. If the motor doesn't operate at all or just hums, you probably need to replace the pump and motor assembly. Unplug the coolant level sensor on the passenger side. Most of the supplies needed:
7 Bathtub Plumbing Installation Drain Diagrams from i2.wp.com To remove a shower drain, the drain assembly can be accessed through the shower floor, and pulled out by individual pieces through the exposed drainage hole. Removing a bathtub drain is a straightforward beginner task, especially once you identify the type of tub drain and stopper you have. Remove the spring clip directly above the passenger fan remove the two top rubber mounts using a 10mm radiator if you have not done so already, you need to drain the radiator. Removing a drain assembly from a sink is much easier, as you can access the underside of the sink and many sink drains have similar construction. If you are trying to remove the whole assembly from the bottom of the tub, then the retaining nut might be stripped or damaged from corrosion. Some of these nodes got drain state back; Today we are going to tackle a pop up drain assembly that you would find on your bathroom sink. Then, pull the linkage out of the drainpipe.
Removing a drain assembly from a sink is much easier, as you can access the underside of the sink and many sink drains have similar construction.
The assembly is a kohler 7213 overflow kit which was installed along w/ the tub it goes with by a licensed plumber about 2.5 years ago. The drain in our tub is slow and i'd like to snake it. Tools you'll need to remove the bathtub drain. Since you cannot access the underside of the bathtub, you must remove the stopper to access the drain body. A sink drain assembly requires a few simple tools to remove. The entire drain assembly should be removed so the seals can be inspected. A drain assembly, drain wrench, plumbers putty, teflon tape, pipe wrench, screwdriver. After i remove all the pieces of the drain assembly, doesn't it make sense to go ahead and. If it is screwed in, unscrew it from inside the tub and pull it up. Fan assembly remove the upper radiator hose from the radiator. Unplug the coolant level sensor on the passenger side. The flange is the drain's visible part. Show node a10 which showed reason=slurmdspooldir is full the other reason a node is in the drain state is if the facts about the system do not match those declared in the /etc/slurm/slurm.conf file.
You can find this tool at a hardware store. After i remove all the pieces of the drain assembly, doesn't it make sense to go ahead and. A sink drain assembly requires a few simple tools to remove. Sink basin or sink strainer leaks occur at the drain assembly of all types of sinks due to improper installation, loose parts, missing gaskets or remove all of the white plastic parts (or equivalent at your sink) that you see in the photos above. Tools you'll need to remove the bathtub drain.
How To Remove A Garbage Disposal Repair And Re Install from www.homemadehints.com Show node a10 which showed reason=slurmdspooldir is full the other reason a node is in the drain state is if the facts about the system do not match those declared in the /etc/slurm/slurm.conf file. The drain assembly sits below the metal screen, and typically is attached to the tub itself. The entire drain assembly should be removed so the seals can be inspected. If the motor doesn't operate at all or just hums, you probably need to replace the pump and motor assembly. To remove an existing gasket, gently pry it off with a flathead screwdriver. The flange is the drain's visible part. Some are screwed right into the crosshairs of the drain basket, which means you can simply unscrew them and set them aside. After i remove all the pieces of the drain assembly, doesn't it make sense to go ahead and.
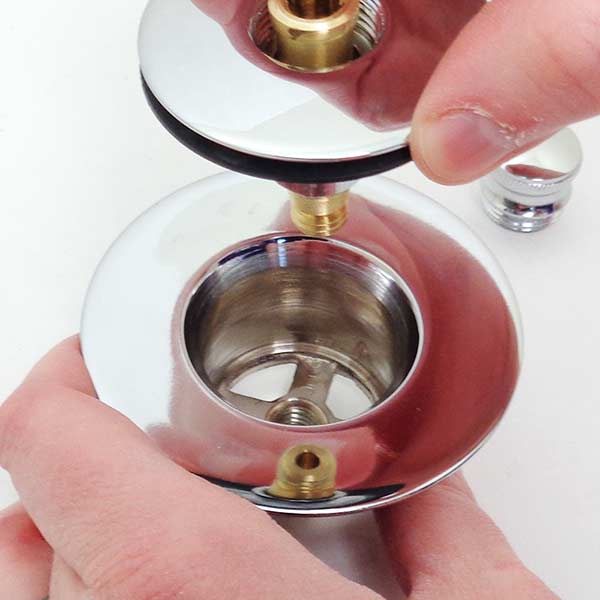
Remove the drain stopper or screen to gain access to the tub's drain fitting.
Some of these nodes got drain state back; You can find this tool at a hardware store. Then, pull the linkage out of the drainpipe. These parts can be replaced at any. If you are trying to remove the whole assembly from the bottom of the tub, then the retaining nut might be stripped or damaged from corrosion. But i can't remove the stopper and also note that a clogged vent will also make for slow drainage (need air behind water for fast drainage) so if this doesn't fix the problem you may. Remove the original drain assembly. Be sure to keep a container or towel near, as there will probably be water in this hose. I was planning on going through the overflow / drain stopper toggle plate: It runs directly into the drain pipe, which after running through your home's plumbing, enters a sewer or septic system. A bathtub drain acting up and becoming clogged or leaking is among the peskiest (and most common) plumbing problems to be encountered in any home. If there are screws that. The drain assembly sits below the metal screen, and typically is attached to the tub itself.
The assembly is a kohler 7213 overflow kit which was installed along w/ the tub it goes with by a licensed plumber about 2.5 years ago. A bathtub drain acting up and becoming clogged or leaking is among the peskiest (and most common) plumbing problems to be encountered in any home. If you aren't interested in replacing or are unable to replace your entire drain assembly, we offer a number of conversion kits that fit right over your existing drain. Remove one of the screws from the overflow plate on the wall of the tub. Today we are going to tackle a pop up drain assembly that you would find on your bathroom sink.
How To Remove A Bathtub Drain Stopper from www.plumbingsupply.com Since you cannot access the underside of the bathtub, you must remove the stopper to access the drain body. Noticed their root partition was full after e.g. Remove one of the screws from the overflow plate on the wall of the tub. There different ways to do it using simple tools. Instructions for removing bathtub drain stoppers. Remove the drain stopper or screen to gain access to the tub's drain fitting. Have you had issues with your ge dishwasher not draining? Tools you'll need to remove the bathtub drain.
Others have a hair catch set into the drain above it.
I was planning on going through the overflow / drain stopper toggle plate: The drain in our tub is slow and i'd like to snake it. Unplug the coolant level sensor on the passenger side. Remove one of the screws from the overflow plate on the wall of the tub. Ensure that the stopper is in the up position. Pfister push & seal drain stoppers are preinstalled as part of the entire drain flange assembly. In most cases, removing a flange is relatively easy. Remove the drain stopper or screen to gain access to the tub's drain fitting. Then, remove the drain basket with a drain wrench. Once the drain flange/strainer basket was removed, i turned it over to discover the plumber's hi raj, the tool is a bathtub drain remover tool and you can use a hair dryer to heat up then remove the old putty. It's something you can easily do from within the bathtub. I assume the best (maybe only) way to fix it is to make a cut before the joint, remove the drain assembly, glue in an extension, and then glue in and install a new. A bathtub drain acting up and becoming clogged or leaking is among the peskiest (and most common) plumbing problems to be encountered in any home.